
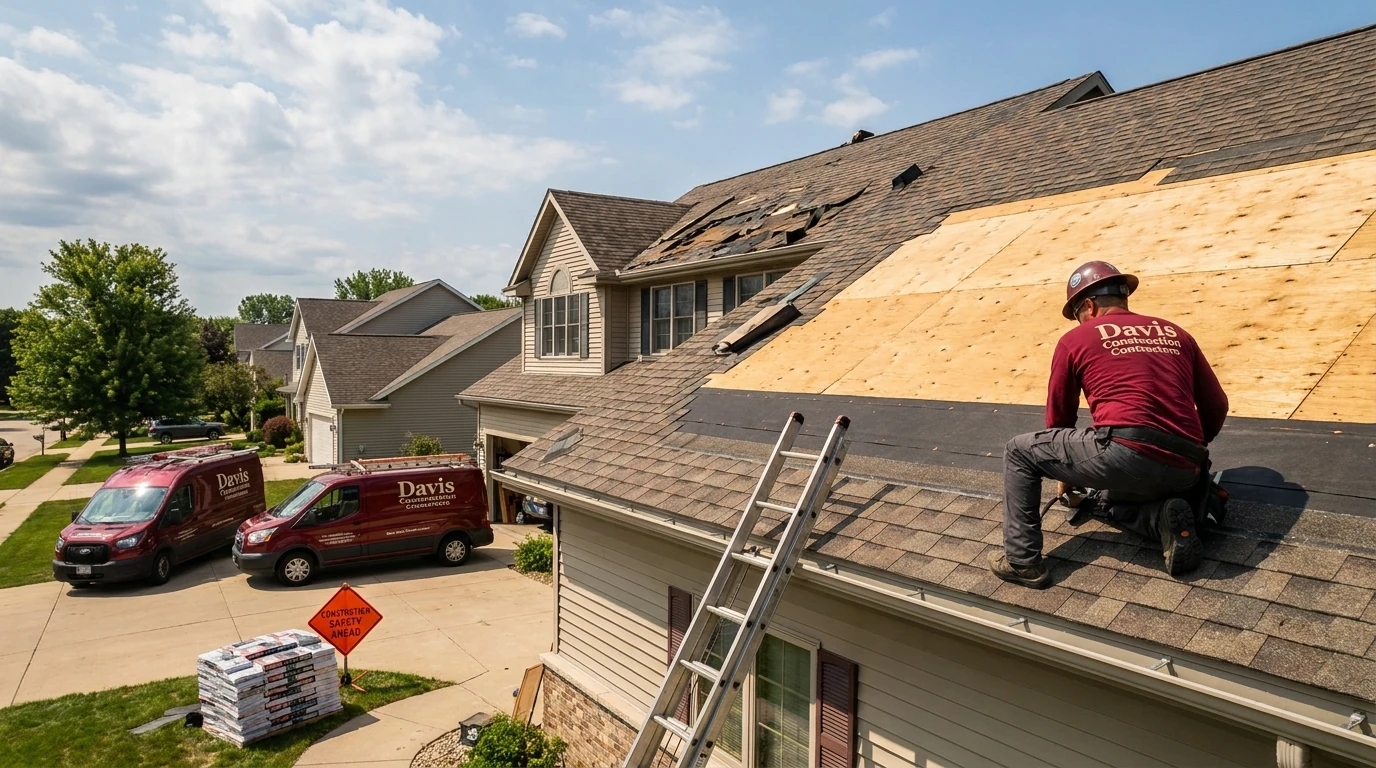
What Actually Happens During a Storm Damage Repair
Storm damage repair follows a predictable sequence: documentation, mitigation, inspection, insurance scoping, and rebuild. The process usually starts within days of the storm (sooner if water is actively entering the home) and can run anywhere from a couple of weeks for cosmetic roof and siding work to several months if structural framing, interior drywall, or flooring needs to be torn out and replaced. Understanding each stage helps you know what questions to ask a contractor and what your insurance adjuster is actually looking for when they walk your property.
If you’re standing in your yard right now looking at missing shingles, a tarp flapping in the wind, or water stains spreading across a ceiling, here’s how the repair process unfolds from this point forward.
Step One: Document Before You Touch Anything
Before any cleanup or temporary repair happens, photograph and video everything.
- Walk the exterior and shoot wide shots of each elevation, then close-ups of visible damage: missing or lifted shingles, dented gutters, cracked siding, downed branches on the roofline.
- Photograph interior damage room by room, including ceiling stains, buckled flooring, and anything touched by water.
- Note the date and approximate time of the storm if you know it (local weather service records can confirm wind speed or hail size later if your claim is disputed).
- Keep receipts for any temporary materials you buy, like tarps or plastic sheeting. Insurance carriers typically reimburse reasonable mitigation expenses.
This documentation becomes the backbone of your insurance claim, and it’s much easier to gather it now than to reconstruct it after cleanup has started.
Step Two: Stop Further Damage (Mitigation)
Once the damage is documented, the priority shifts to keeping water out and preventing the loss from growing.
- Roof breaches: A tarp installed over exposed decking is a stopgap, not a fix. It needs to be secured tightly at the edges and checked after any additional wind event, since a loose tarp can do more harm by trapping moisture against the roof deck.
- Broken windows or siding gaps: Plywood or heavy plastic sheeting keeps wind-driven rain from soaking insulation and framing behind the wall.
- Standing water indoors: If water has pooled on flooring, it needs to be extracted within the first 24 to 48 hours. Wet drywall, subfloor, and insulation left in place longer than that create the right conditions for mold colonization, which turns a straightforward repair into a remediation project.
- Downed trees or limbs on the structure: Don’t attempt to move large debris yourself, especially if it’s resting against power lines or an unstable section of roof. This is where calling in a storm damage restoration crew for board-up and tarping makes the difference between a contained loss and a secondary one.
What Not to Do While You’re Waiting for Inspection
A few common instincts actually work against homeowners during this phase:
- Don’t climb onto the roof yourself. Storm-damaged roof decking can be softer or more unstable than it looks, and hail or wind damage isn’t always visible from the ground or even up close without trained eyes.
- Don’t throw away damaged materials before they’re photographed and, ideally, reviewed by your adjuster or contractor. Carpet, drywall, and insulation are often the first things homeowners want gone, but removing them too early can complicate the claim.
- Don’t accept the first lowball estimate from a traveling storm-chasing crew. After major regional storms, it’s common for out-of-town crews to go door to door. A local contractor who will still be in Madison next year, and who pulls permits through the local building department, is accountable in a way a crew that leaves town after the storm season isn’t.
- Don’t sign an insurance check over or agree to full payment before work starts. Reputable contractors structure payment around project milestones, not full payment up front.
When to Call a Professional (and Who to Call First)
Some storm damage is genuinely a DIY-size problem, like a few dislodged shingles or a dented gutter. But a professional inspection is worth scheduling any time you see:
- Water stains on an interior ceiling, which almost always mean the roofing system above has been compromised, even if the roof looks intact from the ground.
- Granule loss showing up in gutters or downspouts after a hailstorm. This is often the first visible sign of hail damage and one insurance adjusters look for specifically.
- Soft spots, sagging, or a spongy feel anywhere on the roof deck when walked (by a professional, not you).
- Siding or fascia pulled away from the structure, which can indicate wind got underneath and lifted the material.
- Any damage near electrical service entry points or where tree limbs contacted power lines.
A roofing contractor can typically assess storm damage and provide a written scope within a few days of initial contact. That scope becomes the basis for your insurance claim and should outline not just what’s visibly damaged, but what’s likely compromised underneath, like underlayment, decking, or flashing that won’t show obvious signs from a ground-level look.
The Longer Process: Insurance Scoping Through Final Rebuild
Once mitigation is handled and the damage is documented, the repair moves into a longer sequence:
- Adjuster inspection. Your insurance company sends an adjuster to independently assess the damage. It’s worth having your contractor present for this walk-through, since contractors and adjusters sometimes disagree on scope, particularly around what counts as storm-related versus pre-existing wear.
- Scope reconciliation. Your contractor compares their written estimate against the adjuster’s scope. Discrepancies (a missed section of fence, unaccounted-for interior damage, or underestimated roofing materials) get negotiated here, before work begins.
- Material selection and permitting. For roofing or structural work, this is when shingle type, decking material, and any code-required upgrades get decided. Madison and surrounding Madison County jurisdictions require permits for roof replacement and structural repair work, and a licensed contractor handles that paperwork as part of the project, not as an add-on.
- Demolition and tear-out. Damaged materials come out: compromised roofing down to the deck, water-damaged drywall, ruined flooring or insulation.
- Structural repair. Any framing, decking, or subfloor that’s been compromised gets replaced before anything else goes back in. Skipping this step to save time is the single most common cause of callback problems down the line.
- Rebuild and finish work. Roofing, siding, drywall, flooring, and paint go back in, matched as closely as possible to the home’s existing materials and finishes.
- Final walk-through and documentation. Photos of the completed work, paired with your original damage documentation, close out the insurance file and give you a record for future resale or refinancing.
Depending on the extent of damage, this entire sequence can run two to three weeks for a roof-only repair, or several months for a loss that involved significant water intrusion and interior rebuild.
Moving Forward
Storm damage rarely confines itself to what’s visible from the driveway. A roof that looks fine from the ground can be hiding lifted shingles, saturated underlayment, or compromised decking that won’t show up until the next hard rain. If you’re dealing with storm damage in Madison and want a straight answer on what’s actually going on with your roof or structure, Davis Construction Contractors can walk the property, document what’s there, and give you a written scope to take into your insurance claim. Call (256) 771-0326 to get an inspection scheduled.